

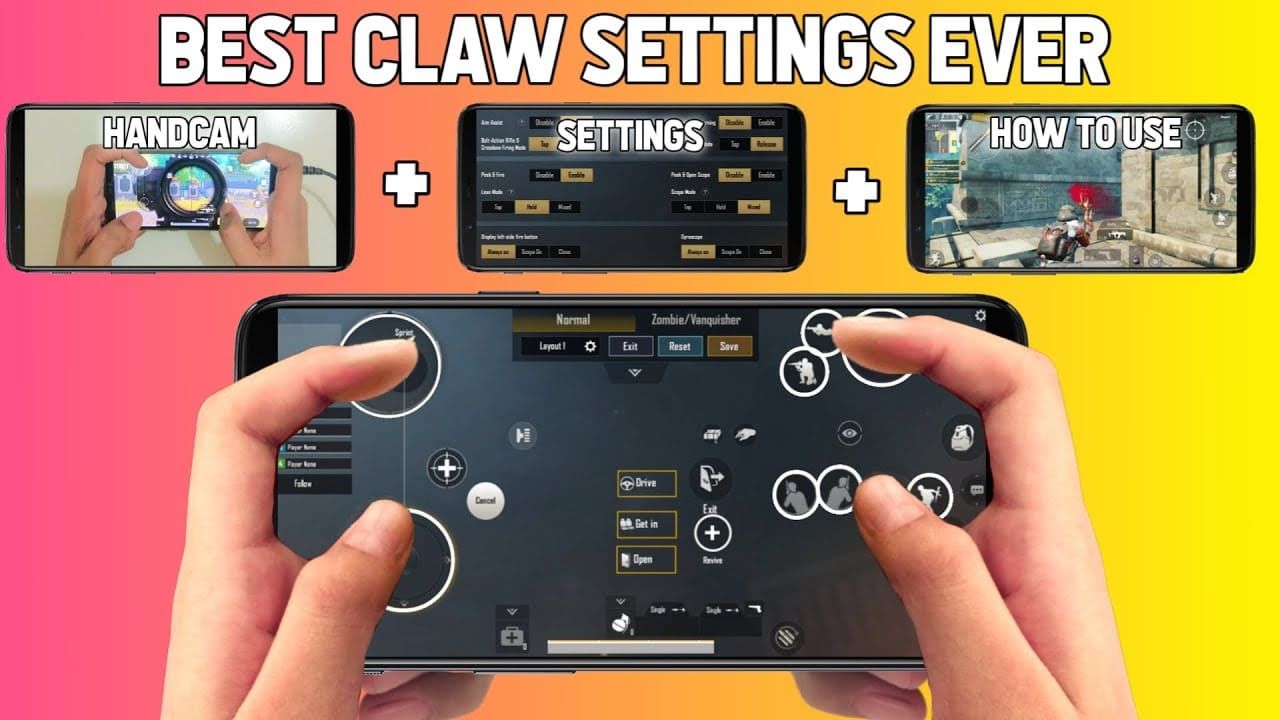
Free Fire is a competitive battle royale game where quick reactions, accurate shooting, and smart movement can make a major difference. Many players use a two- or three-finger control layout, but a four-finger setup can offer more flexibility in intense battles.
Learning the best Free Fire four-finger control tips in 2026 can help you build a comfortable layout that supports your playstyle. This setup is especially useful for players who want to improve close-range fights, headshot accuracy, and movement techniques.
What Is the Four-Finger Control Setup in Free Fire?
A four-finger setup uses both thumbs and both index fingers to control different actions. Typically, the left thumb handles movement, the right thumb controls camera movement and aiming, and the index fingers manage shooting and other important buttons.
This arrangement lets you perform several actions at once instead of lifting a thumb to press another control. It may feel difficult at first, but consistent practice can build muscle memory and help you react faster in combat.
Understand the Best Four-Finger HUD Layout
The HUD, or heads-up display, determines where buttons appear on your screen. For a four-finger layout, place the movement joystick at the bottom left and the camera or aiming area on the right. Position the fire buttons near the upper corners where your index fingers can reach them comfortably.
Keep jump, crouch, prone, reload, and other frequently used actions within easy reach. Avoid placing buttons too close together, as accidental presses can hurt your performance. A clean, balanced layout makes it easier to control your character in fast encounters.
Assign Each Finger a Clear Responsibility
The main advantage of four-finger controls is that each finger can handle a specific task. Your left thumb moves your character, while your right thumb adjusts the camera, tracks opponents, and helps aim accurately.
Your left index finger can control the fire button, while your right index finger can handle jumping, crouching, or another action you use often. You can change these assignments to suit your preferred hand position. The goal is to reduce unnecessary finger movement and make important actions easier to perform together.
Choose Comfortable Fire Button Settings
Fire button placement is important because you need to shoot accurately without losing control of your movement. Many four-finger players place a fire button near the upper-left or upper-right portion of the screen, depending on their preferred layout.
Experiment with button size and transparency in the HUD editor. A larger button may be easier to press, while a smaller button can leave more screen space visible. Select a size that supports reliable taps without blocking your view of nearby enemies.
Adjust Sensitivity for Better Aim
Sensitivity controls how quickly your camera and aim respond to finger movement. If sensitivity is too high, your crosshair may move beyond the target. If it is too low, tracking a rapidly moving opponent can become difficult.
Start with your current settings and make small adjustments in training mode. Test your aim at different distances and with several weapon types. Avoid copying another player’s sensitivity values without testing them, because devices, screen sizes, and personal control styles differ.
Practice Headshots With Four-Finger Controls
Four-finger controls can make it easier to combine movement and shooting, which may support headshot practice. Keep your crosshair around the opponent’s upper body when approaching, then practice controlled upward movements while firing to learn your weapon’s recoil pattern.
Do not expect every shot to become a headshot immediately. Spend time practicing with your preferred weapons and learn how their firing patterns behave. Consistency, crosshair placement, and good timing are more valuable than relying on one movement trick.
Improve Movement During Close-Range Fights
Close-range battles often require quick direction changes while shooting. A four-finger layout lets you move with your left thumb while your index finger fires and your right thumb adjusts your aim.
Practice strafing, jumping, and crouching in controlled situations before using these techniques in ranked matches. Avoid repeating movements without purpose. Effective movement should make you harder to hit while keeping your crosshair near your opponent.
Configure Jump, Crouch, and Prone Buttons
Jumping and crouching can change your character’s position during a fight. Place these buttons where your index finger or thumb can reach them without interrupting your primary controls. If a button is difficult to press during combat, move it closer or adjust its size.
Prone and crouch actions should be used carefully because different situations call for different movements. Practice switching between these actions while maintaining aim. A comfortable setup helps you react naturally instead of searching for the right button during a fight.
Use Training Mode to Build Muscle Memory
Training mode provides a safe environment to test your HUD, sensitivity, and finger coordination. Begin by moving around while looking in different directions, then add shooting, jumping, and crouching. Focus on performing these actions smoothly instead of rushing through the exercises.
Repeat the drills until your fingers start to remember where the controls are. If you frequently press the wrong button, adjust your layout instead of forcing yourself into an uncomfortable position. Small improvements can make the setup easier to manage over time.
Select Graphics and Performance Settings Carefully
Smooth gameplay matters when you need quick reactions. Choose graphics settings that allow your phone to maintain stable performance. If your device struggles with demanding graphics, reducing visual quality may help improve consistency.
Close unnecessary background apps when appropriate, and avoid playing when your phone is overheating. Performance can vary between devices, so test your settings in actual matches as well as training mode. Stable performance helps you judge movement and aim more reliably.
Avoid Common Four-Finger Control Mistakes
One common mistake is copying a professional player’s HUD exactly. A layout designed for a larger screen or different hand position may be uncomfortable on your device. Another mistake is changing sensitivity, button placement, and controls all at once, which makes it hard to tell what actually improves your gameplay.
Avoid holding your fingers in uncomfortable positions for long periods. Take breaks if your hands get tired, and adjust your controls gradually. The best setup is one you can use comfortably and consistently, not simply one that looks impressive.
Customize the Layout for Your Device
Screen size directly affects how comfortably you can use four-finger controls. Smaller phones may require more compact button placement, while larger screens can provide additional room for separate actions. Your grip also matters because your fingers need to reach the controls without straining.
Test your layout while holding your phone in your normal playing position. Make sure your index fingers can reach their assigned buttons and your thumbs can move freely. Adjust the arrangement until the controls feel natural during both slow movement and fast combat.
Develop a Daily Four-Finger Practice Routine
A short daily routine can help you become comfortable with the new control system. Start with five minutes of movement practice, followed by aim tracking, controlled firing, and jumping or crouching while shooting. Focus on smooth coordination rather than speed alone.
After warming up, play a few casual matches and evaluate your performance. Notice whether you miss buttons, lose aim while moving, or struggle in close-range fights. Work on one weakness at a time before making further HUD changes.
Read Also: Discover How To Stand Out In Free Fire With Free Diamonds
Combine Four-Finger Controls With Smart Gameplay
A strong control layout is useful, but it cannot replace good decision-making. Pay attention to cover, enemy positions, ammunition, and the safe zone. Even with fast controls, rushing into several opponents without a plan can lead to an early elimination.
Use your improved coordination to move between cover, maintain aim, and respond to changing situations. Choose fights carefully and avoid unnecessary exposure. A comfortable HUD combined with smart positioning gives you a stronger foundation for ranked matches.
Find the Best Four-Finger Settings for Your Playstyle
No single four-finger layout works perfectly for every Free Fire player. Aggressive players may prioritize easy access to firing, jumping, and crouching, while defensive players may prefer controls that support careful aiming and movement.
Test your layout over several sessions before deciding whether it works. Keep the settings that feel comfortable and change only the parts that cause problems. With patience and regular practice, you can develop a personalized setup that supports your gameplay goals.
Frequently Asked Questions (FAQs)
What is a four-finger setup in Free Fire?
It is a control method that uses both thumbs and both index fingers to manage movement, aiming, shooting, and other actions.
Is four-finger control better than two-finger control?
It can allow more actions to be performed simultaneously, but the best option depends on your comfort, experience, and device.
Is four-finger control suitable for beginners?
Yes. Beginners can learn it gradually by practicing basic movement and shooting before adding more complex actions.
Where should I place the fire button?
Place it where your index finger can reach it comfortably without blocking your view or interfering with other controls.
What sensitivity is best for four-finger gameplay?
There is no universal best sensitivity. Start with comfortable settings and adjust them gradually after testing your aim in training mode.
Can four-finger controls improve headshots?
They can make it easier to combine aiming, movement, and shooting. However, headshot accuracy still depends on practice, timing, and recoil control.
How long does it take to learn four-finger controls?
The learning period varies from player to player. Regular practice and a comfortable HUD can make the transition easier.
Can I use four-finger controls on a small phone?
Yes, as long as you can reach the buttons comfortably. A compact HUD may be necessary on smaller screens.
Should I copy a professional player’s settings?
Use professional layouts as inspiration, but customize button placement and sensitivity to match your device and preferences.
How can I improve my four-finger gameplay quickly?
Practice movement, aim tracking, and simultaneous actions in training mode. Keep your HUD consistent and correct mistakes gradually.
Conclusion
The Free Fire Four-Finger Setting Best Control Tips in 2026 can help players build a comfortable control layout and improve coordination in combat. Focus on clear finger assignments, accessible buttons, suitable sensitivity, and regular training.
Remember, four-finger controls are a tool to improve your gameplay, not a guarantee of victory. Choose settings that suit your device and hand position, practice consistently, and improve gradually.
